Assign to a Property
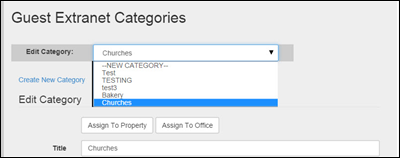
To assign a category to a property, click on the
‘Categories’ tab from the Welcome Home Dashboard. When the page opens, select the category you
want to assign from the ‘Edit Category’ drop down menu.
Categories Screen- Assigning a Category - Selecting a Category
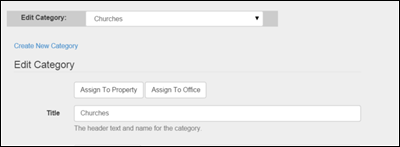
After you have selected the category, and the category
information displays, click on the white ‘Assign to Property’ button located
under the ‘Edit Category’ heading.
Categories Screen- Assigning a Category to a Property
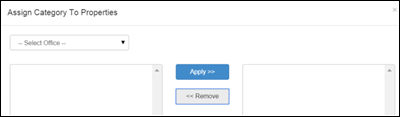
Clicking on the ‘Assign To Property’ button will open a
new screen. On the left of the screen
you will see a dropdown menu to select which one of your offices the
property/properties are associated with you want to apply the rule to.
Categories Screen - 'Assign To Property' Button Clicked to Open ‘Apply Category
to Properties’ Screen
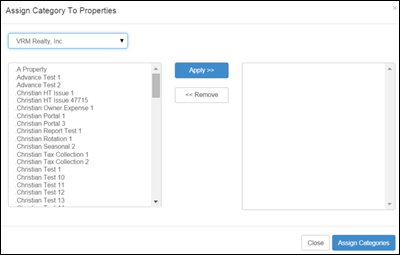
For our example, I would select ‘VRM Realty, Inc.’, from the
drop down menu. This would generate a
list of all the properties that are managed through our VRM Realty Office.
Categories Screen - ‘Assign Category To Properties’ Screen with Office Selected
from Dropdown Menu
Click on the property in the left hand box that needs to
have the category assigned to it. To add
multiple properties at one time, click on the first property in the list you
want to add, hold the SHIFT key, and click on the last property in the list. Or, if the
properties are not listed consecutively, click the first property you want to
add, hold the CTRL key and click the other properties you want to add. After selecting the properties, click the
blue ‘Apply >>‘ button to add them to the window on the right hand side
of the screen.
For our example, all of the ‘VRM’ properties are located
close to the churches listed in the ‘Churches’ category, so I would want to assign
that category to all of them. I would
click on ‘VRM Brittany’s Beast’, hold the SHIFT key, click on ‘VRM Trevor’s
Haunt’, and then click the ‘Apply >>‘ button. All of these properties will now appear in
the box on the right side of the screen.
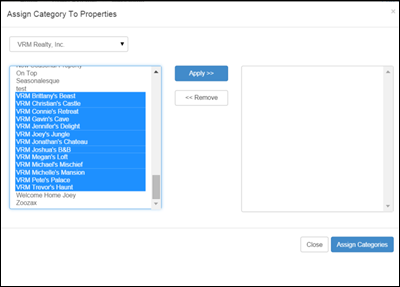
Categories Screen - ‘Assign Category To Properties’ Screen with Properties
Selected
After the list is complete, click the blue ‘Assign
Categories’ button at the bottom right of the screen. Then click the white ‘Close’ button.
From this point on, for our example, any guest staying in one
of our ‘VRM’ properties will see the ‘Churches’ category under the ‘Property
Details’ section of the Guest Extranet.
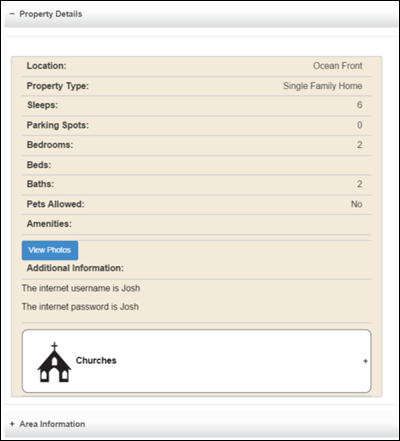
Guest Extranet - Property Details Section
When a guest clicks the plus sign on the right side of the
‘Churches’ heading, the detailed information you entered in the ‘Categories’
screen will display.
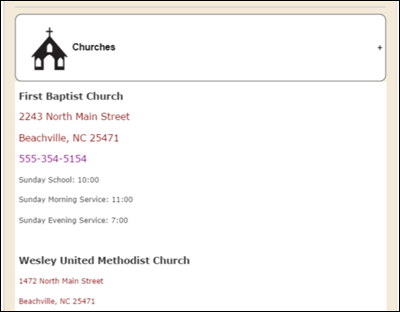
Guest Extranet - Property Details Section - 'Churches' Category Open
Revision 1.4