Loading...

01 CMS 2.X Admin Bar Overview

CMS Responsive Website Version

These Instructions apply to the CMS version that is included in websites launched in December 2013 or later. If your website was launched earlier than December 2013, you will need to view the earlier tutorials. Click this link, Content Management System (CMS)  to go back to the main tutorial menu.

CMS Admin Menu Items

All of the editing items are contained in the menu that runs across the top of your website when you are logged in. See the image below. (Click on any image to view it larger.)


Content

List Content

From the list content page you can see a full list of all content pages created in the CMS along with details and links for editing. If you look click the edit link, you will go to the page editing features explained below. The settings link will take you to the page settings menu also explained below.

New Page

  • This is where you start if you want to create a completely new page.

  • Navigation Menu Title: This is the text that will show in the main menu.
  • Publish this page and make it visible: Chech this box if you want the link to the page visible to anyone on your site. If it is unchecked the link is only available when you are logged in and will have an asterisk next to it. However, the page can be viewed if you know the url.
  • Page Hierarchy: The is where you decide where on the menu your link will go. click the arrow and you will see a list of link that are already in the menu. Choose the menu item that you want this new page to follow.
  • Page Filename: This is the URL and will automatically default to be the same as the navigation menu title minus any spaces or special characters. Spaces will be replaced with hyphens and special characters will be stripped from the URL. You can change the filename. DO NOT add the .asp or .html to the end of the filename as it will automatically be appended.
  • Page Section: The page section gives you the choice of adding a side bar to your content pages. Depending on the configuration of your site, you may have two or more options under page section. The rentals sidebar will give you a vacation quick search on the left side. The sales side bar, a real estate quick search, and if you choose both, you will get both uick searches on the same side.
  • Page Content: Enter your content here. For an overview of the WYSIWYG editor please view our tutorial here. You can choose not to enter content here. If you create the page without content you will be able to add and edit content later by navigating to the page and then choosing edit content from the Edit dropdown menu.
  • Meta Tags: Add your title and meta description here.
  • Contact For Options: Checking add a contact form will cause a menu to open and you can choose the fields you would like to have on your page for the contac form.

New Blog Post

This is similar to a new page. You can add the blog and will have the opportunity to edit it and publish it at a future time.

The title of your blog i.e., Post Title, will automatically become the URL and the H1 (main headline) of your blog. It will also become the title tag if you do not add a tag in the title tag field

Manage Widgets

Widgets are plugins that you want to add to your page such as Facebook social plugin, weather widgets, calculators, and more.

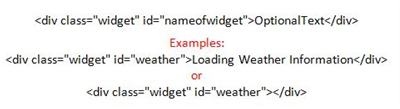
Name your widget and then copy the code into the widget content box and hit submit. After creating your widget, add the following line on your page where you want the widget to show, substituting "nameofwidget" for your name. If you don't use optional text, be sure to include the closing tag.


Direct Links

  • This allows you to add links to your main menu that were not created using the CMS. And example of this may be a link to one of your web group pages or a link to an outsite site. Click the Create a New Direct Link button.

  • Link Title: This is the way it will appear in the menu.
  • Publish this direct link and make it visible: This is the same option as that on the create a new page screen. By leaving it unchecked the link will only be visible if you are logged in.
  • Open this direct link in a new window: In many cases if you are taking a guest off of your website to another website it is common practice to open the other site in a new tab or window leaving your website open as well. Check this box and it will open the link in a new tab or window depending on the users browser settings.
  • Page Hierarchy: Choose which page this link will follow. If you choose a parent (or top) menu item, your link will be a new link on the main menu bar. Choose a submenu item and your new link will follow the link you choose.
  • Link URL: This is where you add the URL. If you leave it blank it will create a bookmark instead. Leave this blank when you want to create a parent menu item that will have sub menu items instead of opening a page.

Media Manager

Upload your photos and images here. You are allowed to create folders to keep you image library organized.

Edit

Navigate to the page you want to edit and then use the submenu items.

Edit Content

Use the WYSIWYG to edit your content. For an overview of the editor icons, click here.

Page Settings

This will allow you to edit the page settings such as menu title, position, meta tags, etc.

View Page

This simply lets you view the page without any messages from the CMS system.

Tools

VRM Console

Takes you directly to your VRM Admin console.

Property Maps

This is your console for changing the map markers for the Google maps on your property pages. The new location will be applied every place the property shows on a map including all search results and the full property map page. For more information on using the console, view this short tutorial.

Clear Cache

In order to help your website perform faster we have instituted a server side cache for pictures. This is onlhy for the VRM search engine pages. So if you were to upload a new thumbnail over a previous thumbnail or photo, you would not see the change right away. You would see the cached photo. Click the clear cache link and this will reset the cache on the server and you will see the change.

Clear Session

Similar to clear cache, except this clears your individual session data and not the server cache.

Help

Takes you to the tips page.

Profile

Allows you to change your email, username and passowrd.


Revision 1.3