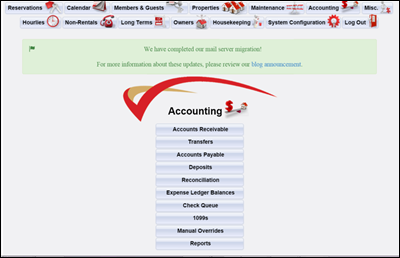
How to Produce your 1099's
An owner's 1099 amount consists of the sum of the year to date Rental Income and the Other Credit amounts. The rental income and other credit amounts are displayed within the summary section of the owner statement. The Other credit amount consists of owner referral fees and transfers to the owners account.
3. Select the '1099 Info' tab on the 1099 page.
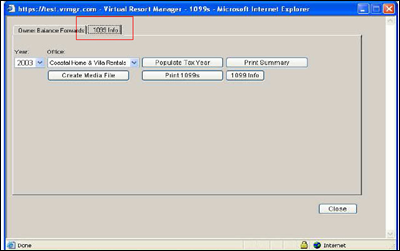
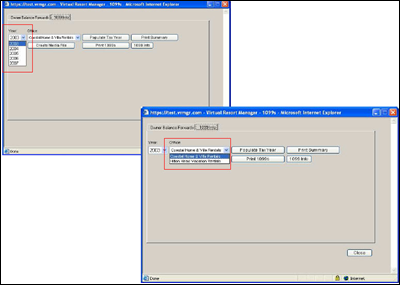
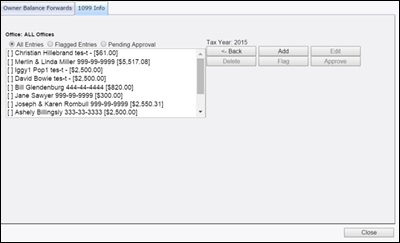
4. Select the Year and office options. From the '1099 Info' tab the end user will select the Year and office option the 1099s are to be generated for.
The management company's 1099 configuration can be setup for each office independently or one set of 1099 configuration values can be used for all of the offices residing within the VRM application.
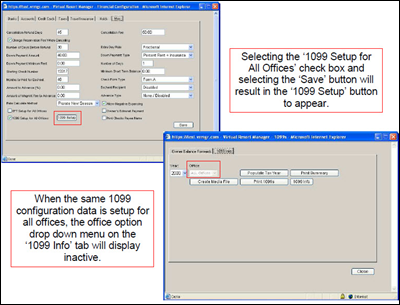
The 1099 configuration used when generating 1099s is driven by the '1099 Setup for All Offices' check box on the 'Misc' tab of the Financial Configuration page.
If the '1099 Setup for All Offices' check box is NOT selected. Each office will need to be setup with an independent set of 1099 configuration values. Office specific 1099 configurations are applied on the 'Offices' tab of the Company Configuration page. If the end user wants to issue office specific 1099s, each office will need to be configured with its' own 1099 configuration. If owners contain properties residing in different offices and office specific 1099s are to be generated, please configure each office with independent 1099 configuration values.
If one 1099 is to be generated for all owners regardless of the owner having different properties within different offices, the end user will select the '1099 Setup for All Offices' check box, select the '1099 Setup' button, and setup the 1099 configuration. Selecting the '1099 Setup for All Offices' check box and then selecting the 'Save' button will result in a '1099 Setup' button to appear on the 'Misc' tab of the Financial Configuration page. Selecting the '1099 Setup' button and applying the 1099
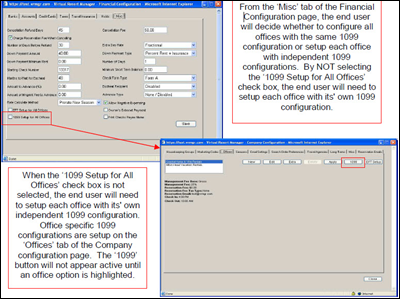
If one 1099 is to be generated for all owners regardless of the owner having different properties within different offices, the end user will select the '1099 Setup for All Offices' check box, select the '1099 Setup' button, and setup the 1099 configuration. Selecting the '1099 Setup for All Offices' check box and then selecting the 'Save' button will result in a '1099 Setup' button to appear on the 'Misc' tab of the Financial Configuration page. Selecting the '1099 Setup' button and applying the 1099 configuration values will result in all 1099s generated from the VRM application to use the same 1099 configuration data. When the 1099 configuration data is setup for all offices, the office option drop down menu on the '1099 Info' tab will appear inactive.
Selecting the 'Populate Tax Year' button will result in the application displaying the 1099 data per the office and year options selected. The entries are displayed in the order of:
1. Tax type (Individual or Business). Individual entries are displayed first.
2. By Office.
3. By Property Name.
At this time the end user needs to verify, edit, add, or delete the 1099s.
When the 1099 edit page is initially displayed the end user can select the following two buttons and can expect the following results:
1. Back. The back button will return the end user to the original '1099 Info' page.
2. Add. The end user has the ability to manually add a 1099 record.
Highlighting a 1099 entry will activate the Edit, Delete, Flag, and Approved buttons.
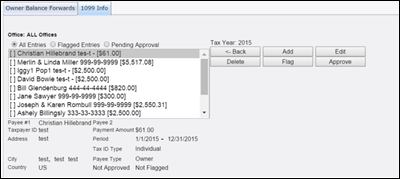
The following buttons will perform the following functions:
1. Edit. The edit button will allow the end user to edit the highlighted 1099 entry.
2. Delete. The delete button will delete the highlighted 1099 entry. If an entry is accidentally deleted the end user can return to the original '1099 Info' page and reload the 1099 data by selecting the same year option, office option , and the 'Populate Tax Year' button.
3. Flag. The flag button will mark the highlighted entry. Selecting the 'Flagged Entries' radial button will only display the 1099 entries which have been flagged.
4. Approve. The approve button is very important. When a 1099 entry is highlighted and the approve button selected, the end user is flagging the entry so it will not change if the 1099 data is reloaded. Selecting the 'Pending Approved' radial button will only display 1099 entries which have not been flagged as approved Every time the end user selects a year option, office option, and the 'Populate Tax Year' button, the application collects the original 1099 data. If the end user has edited 1099
entries, not flagged the entries as approved, closes the 1099 page, and than reloads the 1099 data, the edited entries will return back to their original amounts. When an entry is approved the entry will not change if the 1099 data is reloaded. Flagging entries as approved saves the changes made to the entry. If a new 1099 entry is manually applied, after the entry is added it needs to be fagged as approved.
All 1099 entries need to be flagged as Approved before moving to the next step.
6. Select the 'Back' button. By selecting the back button the end user will be returned to the original '1099 Info' page.
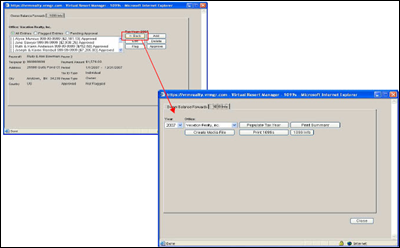
7. The end user can select the 'Print Summary' button to view a report which will consist of the 1099 entries' names, addresses, TIN/EIN,SOC numbers, and amounts.
After reviewing the Print Summary report, if there is a discrepancy within one of the 1099 entries the end user can select the '1099 Info' button to be returned to the 1099 editing page.
8. Select the 'Print 1099s' button. After the 1099 entries have been verified for accuracy select the 'Print 1099s' button. This action will generate the 1099s.
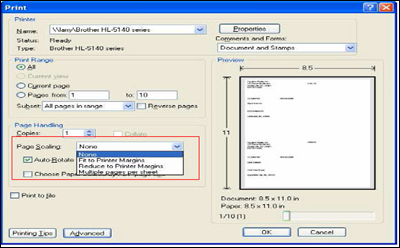
9. Printing the 1099s. Once the 1099s have been generated, it is now time to print the 1099s. Place the 1099 forms accurately into the printer. From the 1099 main menu toolbar select the File option, this action will cause the file drop down menu to appear. Select the Print option from the drop down menu.
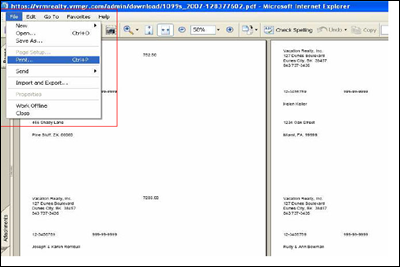
The 'None' page scaling option needs to be selected. Select the 'OK' button, this action will print the 1099s.
Creating Electronic Media Files
Follow instructions through Step 7 above and then:
8. Select the 'Create Media File' button. This action will generate the Electronic 1099
file. Before the file can be sent to the IRS the file has to be reconfigured as a text file.
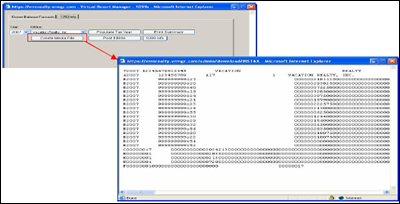
To reconfigure the file as a text file place the mouse cursor within the body of the file and right click. This action will cause a drop down menu to appear. Select the 'View Source' option from the drop down menu.
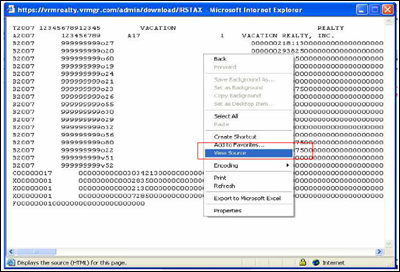
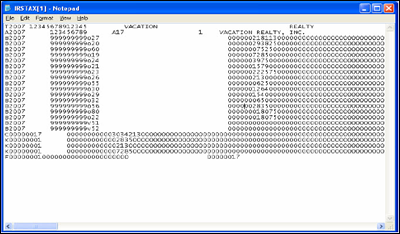
This will cause the file to be opened within Notepad.
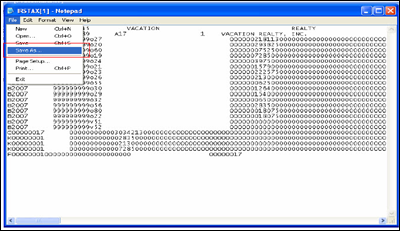
From the 'Notepad' main menu select the 'File' option. This action will cause the file drop down menu to appear. Select the 'Save As' option from the drop down menu.
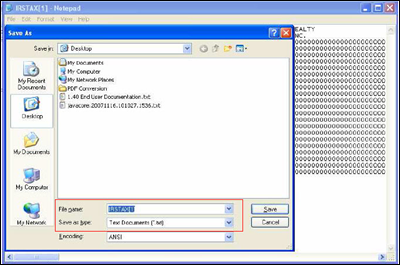
Selecting the 'Save As' option will allow the end user to save the file as a text file, (.txt).
Once the file has been saved as a text file it is ready to be sent/uploaded to the IRS.
Revision 1.8